Now let’s put the knowledge we gained from the first part of the Display campaigns guide into practice. Let’s create your successful campaign.
Settings
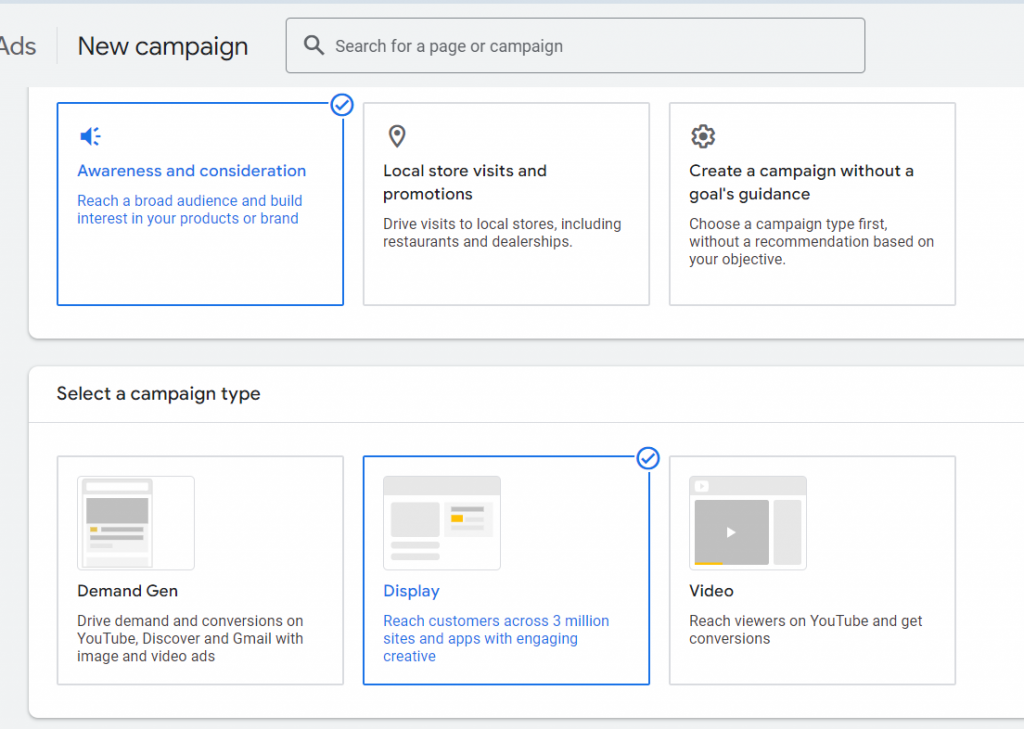
Click on create a new campaign. Select the Awareness and consideration objective and the Display campaign type.
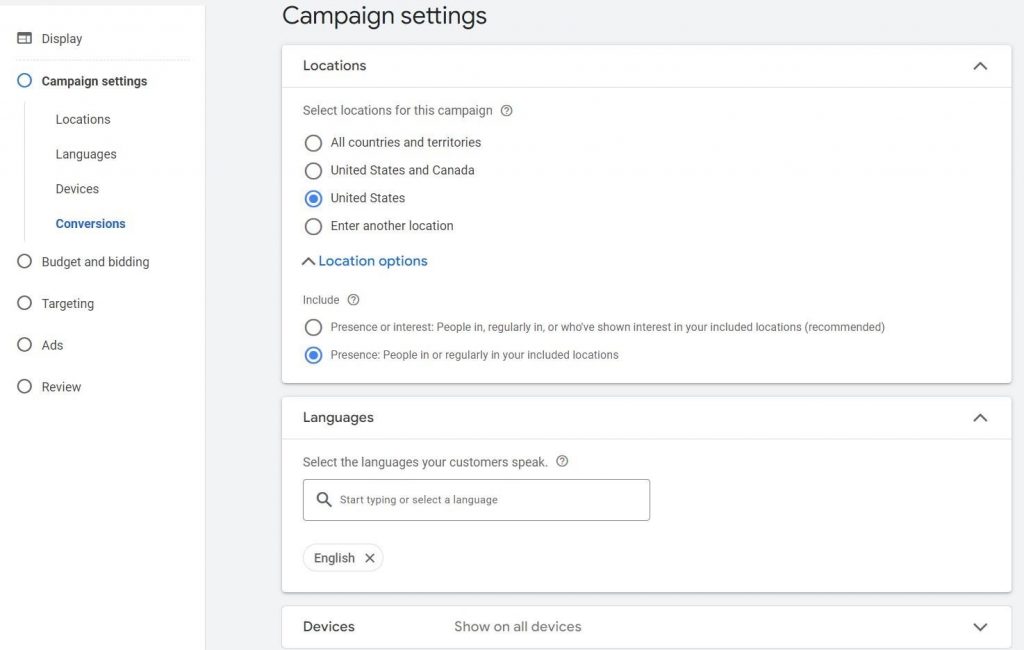
In the next step, select the location and language you plan to target. We recommend making adjustments to devices during the campaign optimization period, so leave the Show on all devices option at the creation stage.
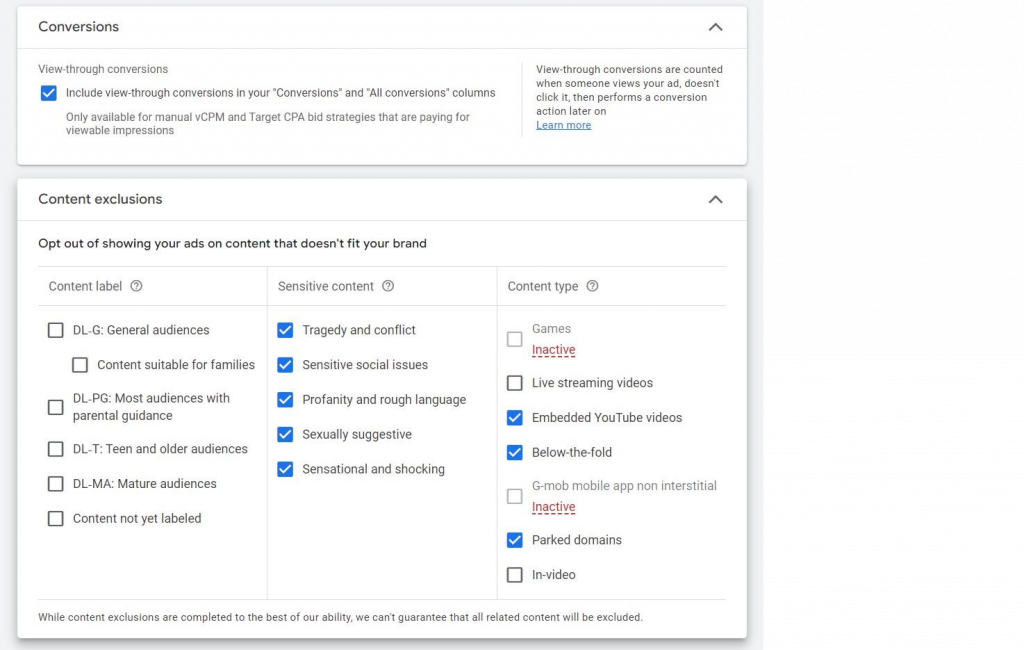
Expand More settings. Here you can see the View through conversions option – conversions when there was only an ad impression to the user, and the conversion was made after a certain period of time through a transition from another or even from this campaign. But it is worth remembering that this function is only possible for manual vCPM and Target CPA bid strategies that are paying for viewable impressions, which we recommend using only after testing Manual CPC or Maximize clicks. Therefore, at the stage of creating a campaign, we leave it to you to choose whether to include them in the statistics.
Here, select the display locations and content types next to which you do not want to display ads that will represent your brand. We recommend avoiding the types we have marked in the screenshot:
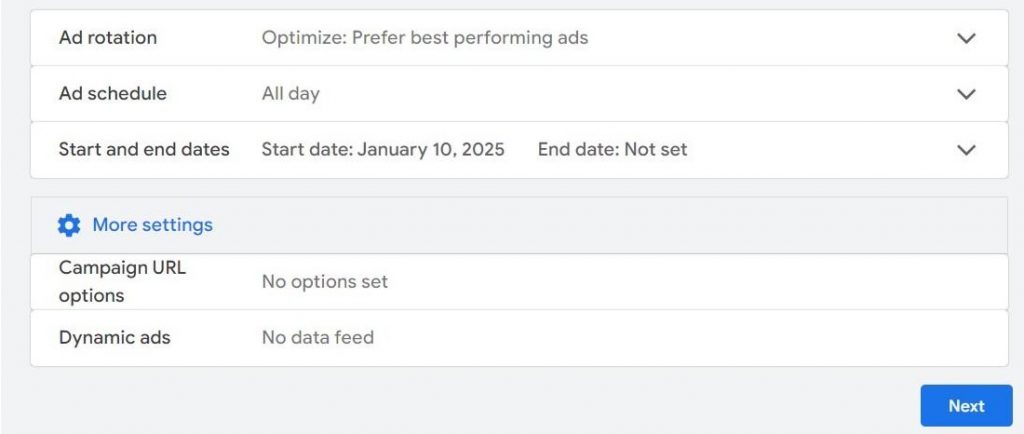
Ad rotation leaves unchanged.
Ad schedule is best set for the time of user activity. For example, from 6 am to 11 pm. However, remember that if your campaign is going to work in large locations with several time zones, the schedule you set will be tied to the time zone of your account, not the user’s time zone.
Start and end dates: by default, the campaign will be active on the day it is created. But if, for example, you want to advertise a promotion with specific dates, then this function will be convenient for just such a case.
Campaign URL options:
Fill in the UTM markup here, if you use it.
Dynamic ads:
We do not recommend using them in the Display campaign.
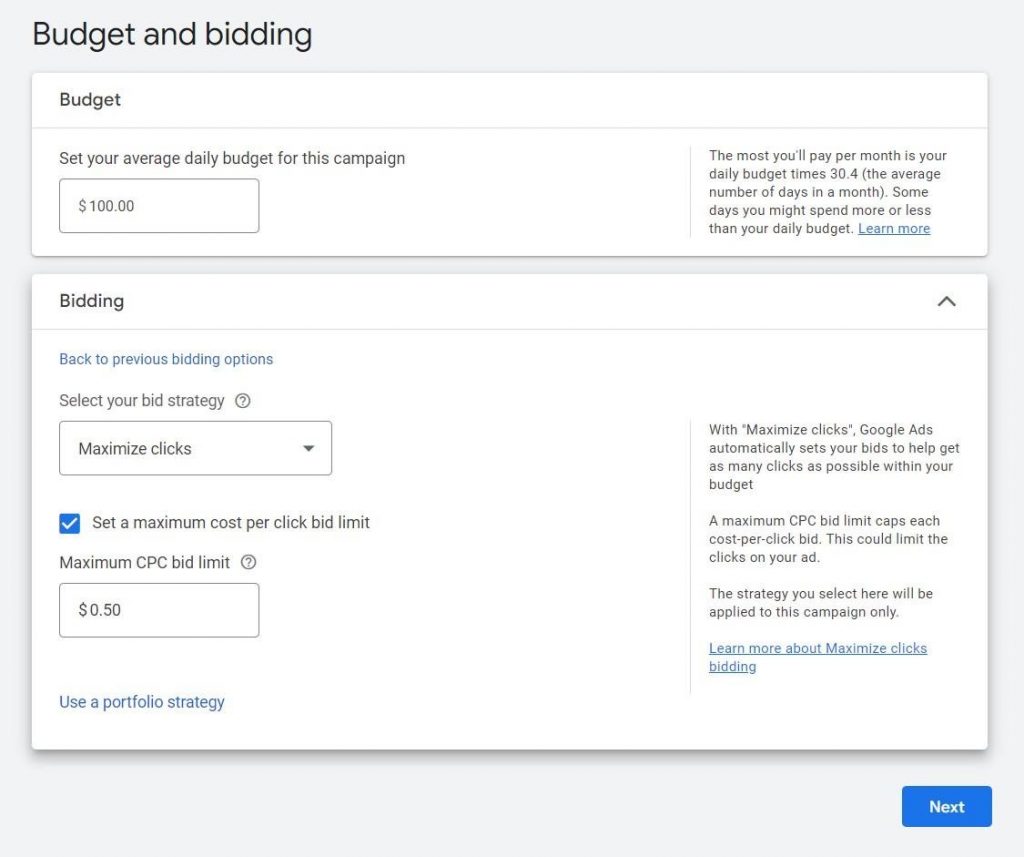
Budget And Bidding.
As with any campaign in Google Ads, when starting out, we recommend setting manual strategy types. In our case, this is Maximize clicks. You can also set a bid limit. You can start with a low bid, and if the daily budget is not clicked out completely, then increase it. There is also an alternative strategy, Viewable CPM, in which you will set bids for 1,000 impressions of your ads.
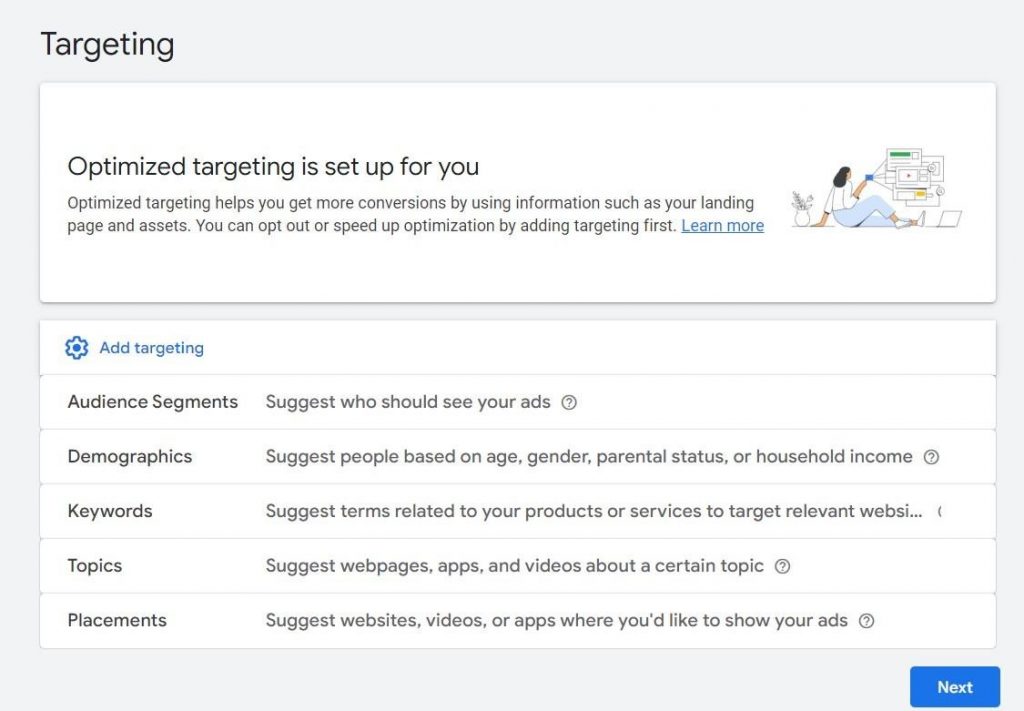
Next, you will get to the targeting selection section. As we have already mentioned, getting the targeting right is a difficult and important task, so pay maximum attention to this step. It would be good if you approached this moment with your target audience research already conducted.
And, of course, do not forget to turn off Optimized targeting.
Ads
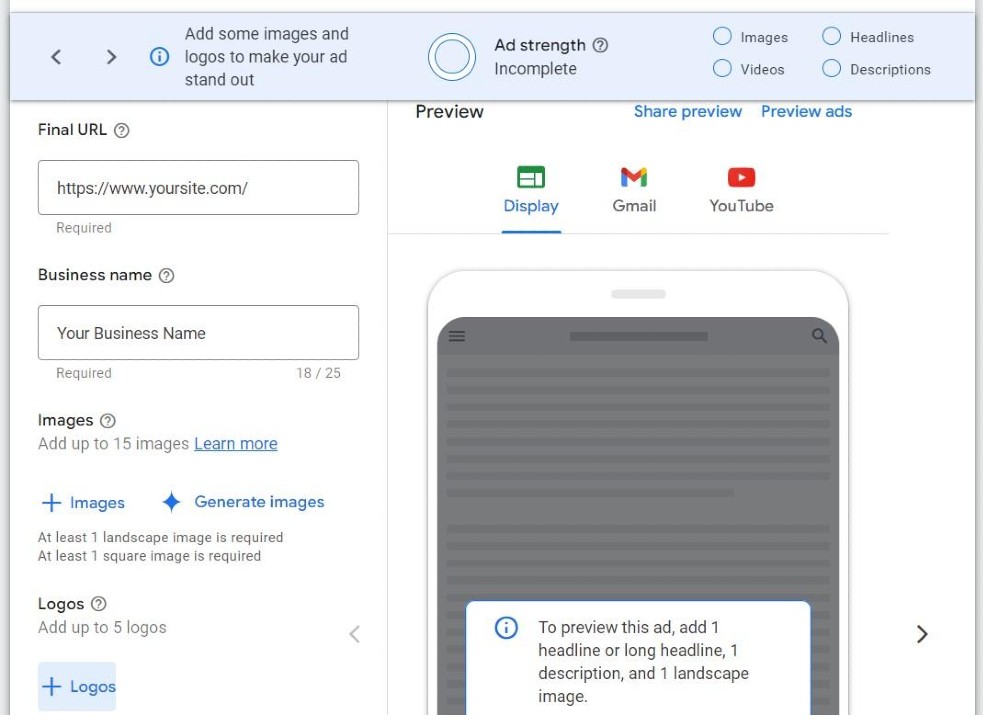
The next step is no less important – creating an ad. Here you need to show maximum creativity in texts, images and videos to attract the user’s attention. Unlike search advertising, where dry texts with a short description of the product and a maximum list of its advantages are usually created, in Display ads you can and should use bright images, bold statements and numbers (prices, discounts, service life, etc.).
Fill In The Final URL And Business Name.
You can use up to 15 images in your ad. There must be one square image among them. There are 3 formats in total – square (usually we use a size of 1000:1000 pixels), horizontal with an aspect ratio of 1.91:1 (1910:1000 pixels) and vertical with a ratio of 9:16 (1080:1920). Accordingly, you can use up to 5 different creatives in 3 formats each.
The images can contain various texts and infographics. Be sure to use your brand or a specific product in them – these parts must be clearly visible and not get lost against the background of other elements of the image.
Upload up to 5 of your logos in two aspect ratios – 1:1 and 1:4.
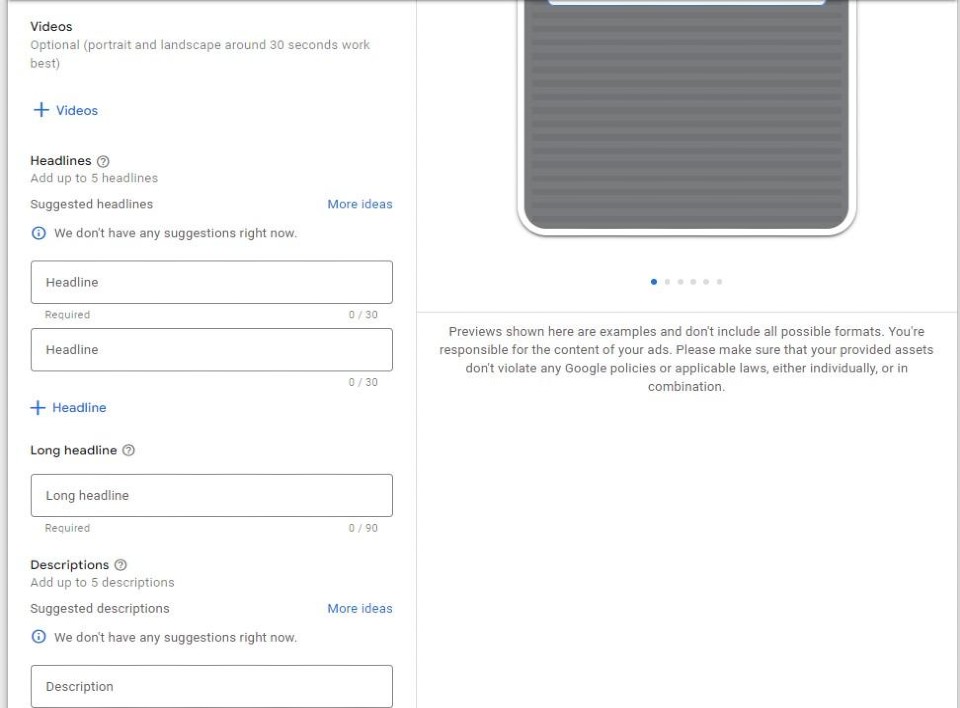
You can use up to 5 videos. Remember that they start playing when they appear in the visible area of the user’s screen without sound, so you also need to follow the principle of showing a clearly visible brand or product here.
The next part of the ad is the texts. You can use up to 5 Headlines up to 30 characters each, 1 Long Headline up to 90 characters and up to 5 Descriptions up to 90 characters.
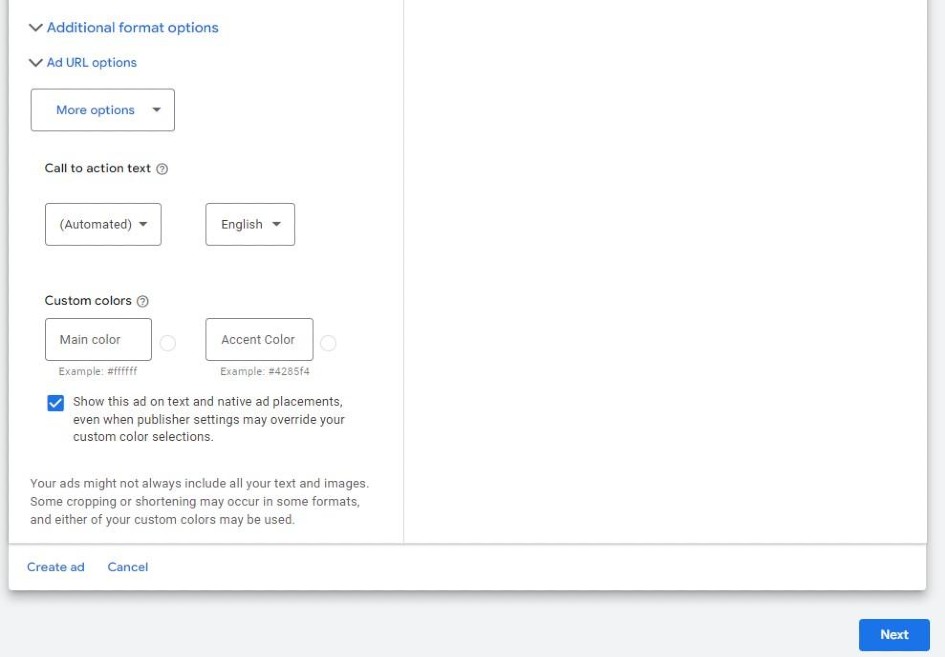
The final part is the Call to action, which you can choose by expanding the More options. You can choose from several standard CTAs or automated, trusting in this case Google Ads.
If you want, you can also choose 2 colors that are associated with your brand, to use with your ad across most formats.
Your ad is created. After that, on the Review page, you can review all the created settings, targetings and ads again, and if you do not find any errors, click Publish campaign. In most cases, ads will be checked within 1-2 hours.
Performance assessment
Some time after the campaign launch, you can see the performance assessment of each image, text or video by clicking the View asset details link. You can replace the least successful of them with new ones.

You can also start optimizing, which you will learn about in the final part of this guide.